
Configure and manage your maintenance status to determine when selected providers should enter a planned downtime window, ensuring transactions are paused and fully controlled during that period.
🗒 Overview
Scheduled Maintenance allows you to set and manage downtime directly from your Paystrator Client Dashboard.
All maintenance schedules are fully controlled on the client side, meaning you decide when specific providers or services should be temporarily paused.
During the maintenance window you configure, Paystrator will automatically stop transactions from being routed to the affected providers and clearly indicate the maintenance status in the dashboard and through API responses.
This ensures smoother operations, prevents unwanted transaction attempts, and gives you complete control over planned downtime—without needing assistance from Paystrator support or provider-side configuration.
📍 Where to Access Scheduled Maintenance
To access the Scheduled Maintenance page:
- Log in to the Paystrator Client Dashboard.
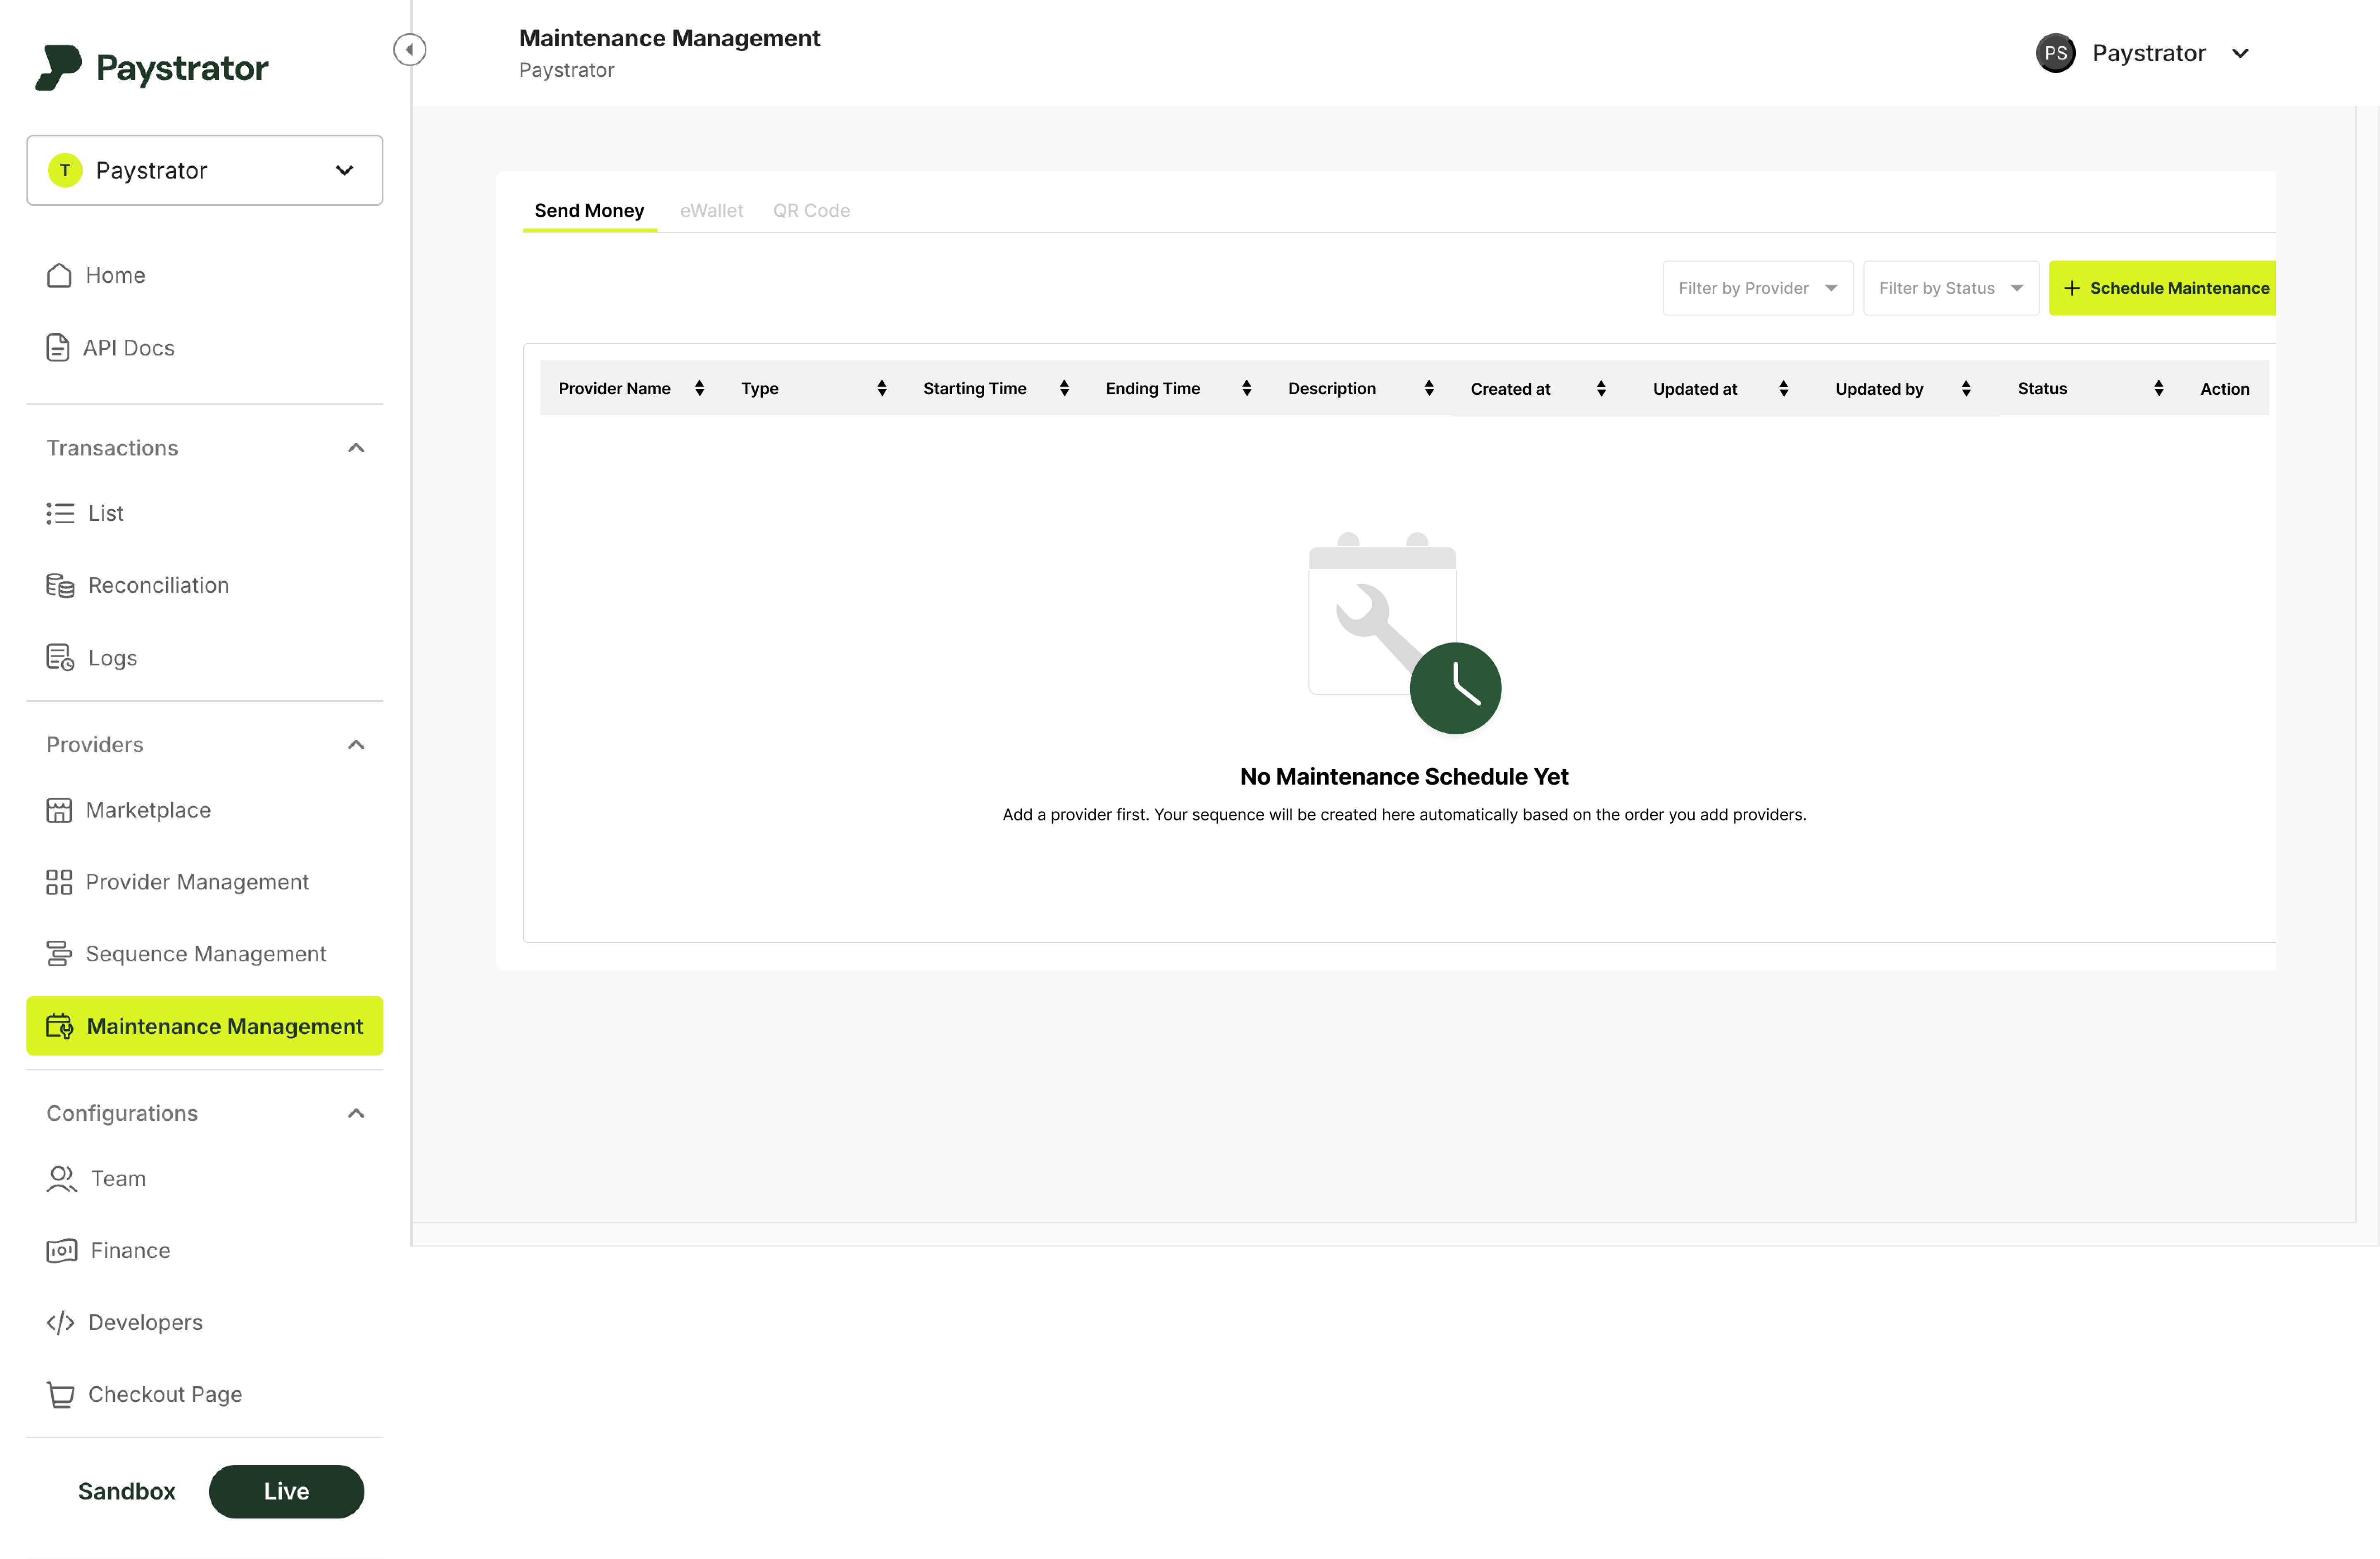
- In the left navigation menu, go to Providers → Maintenance Management.
Note: You must have onboarded (registered) your providers before you can configure maintenance.
✚ Create a Maintenance Schedule
To begin creating a maintenance window:
- Navigate to Maintenance Management from the Providers menu.
- Click the + Schedule Maintenance button located at the top right of the page.
You will then be taken to the setup form, where you can configure the maintenance according to your needs.
❓How to Set Up Maintenance
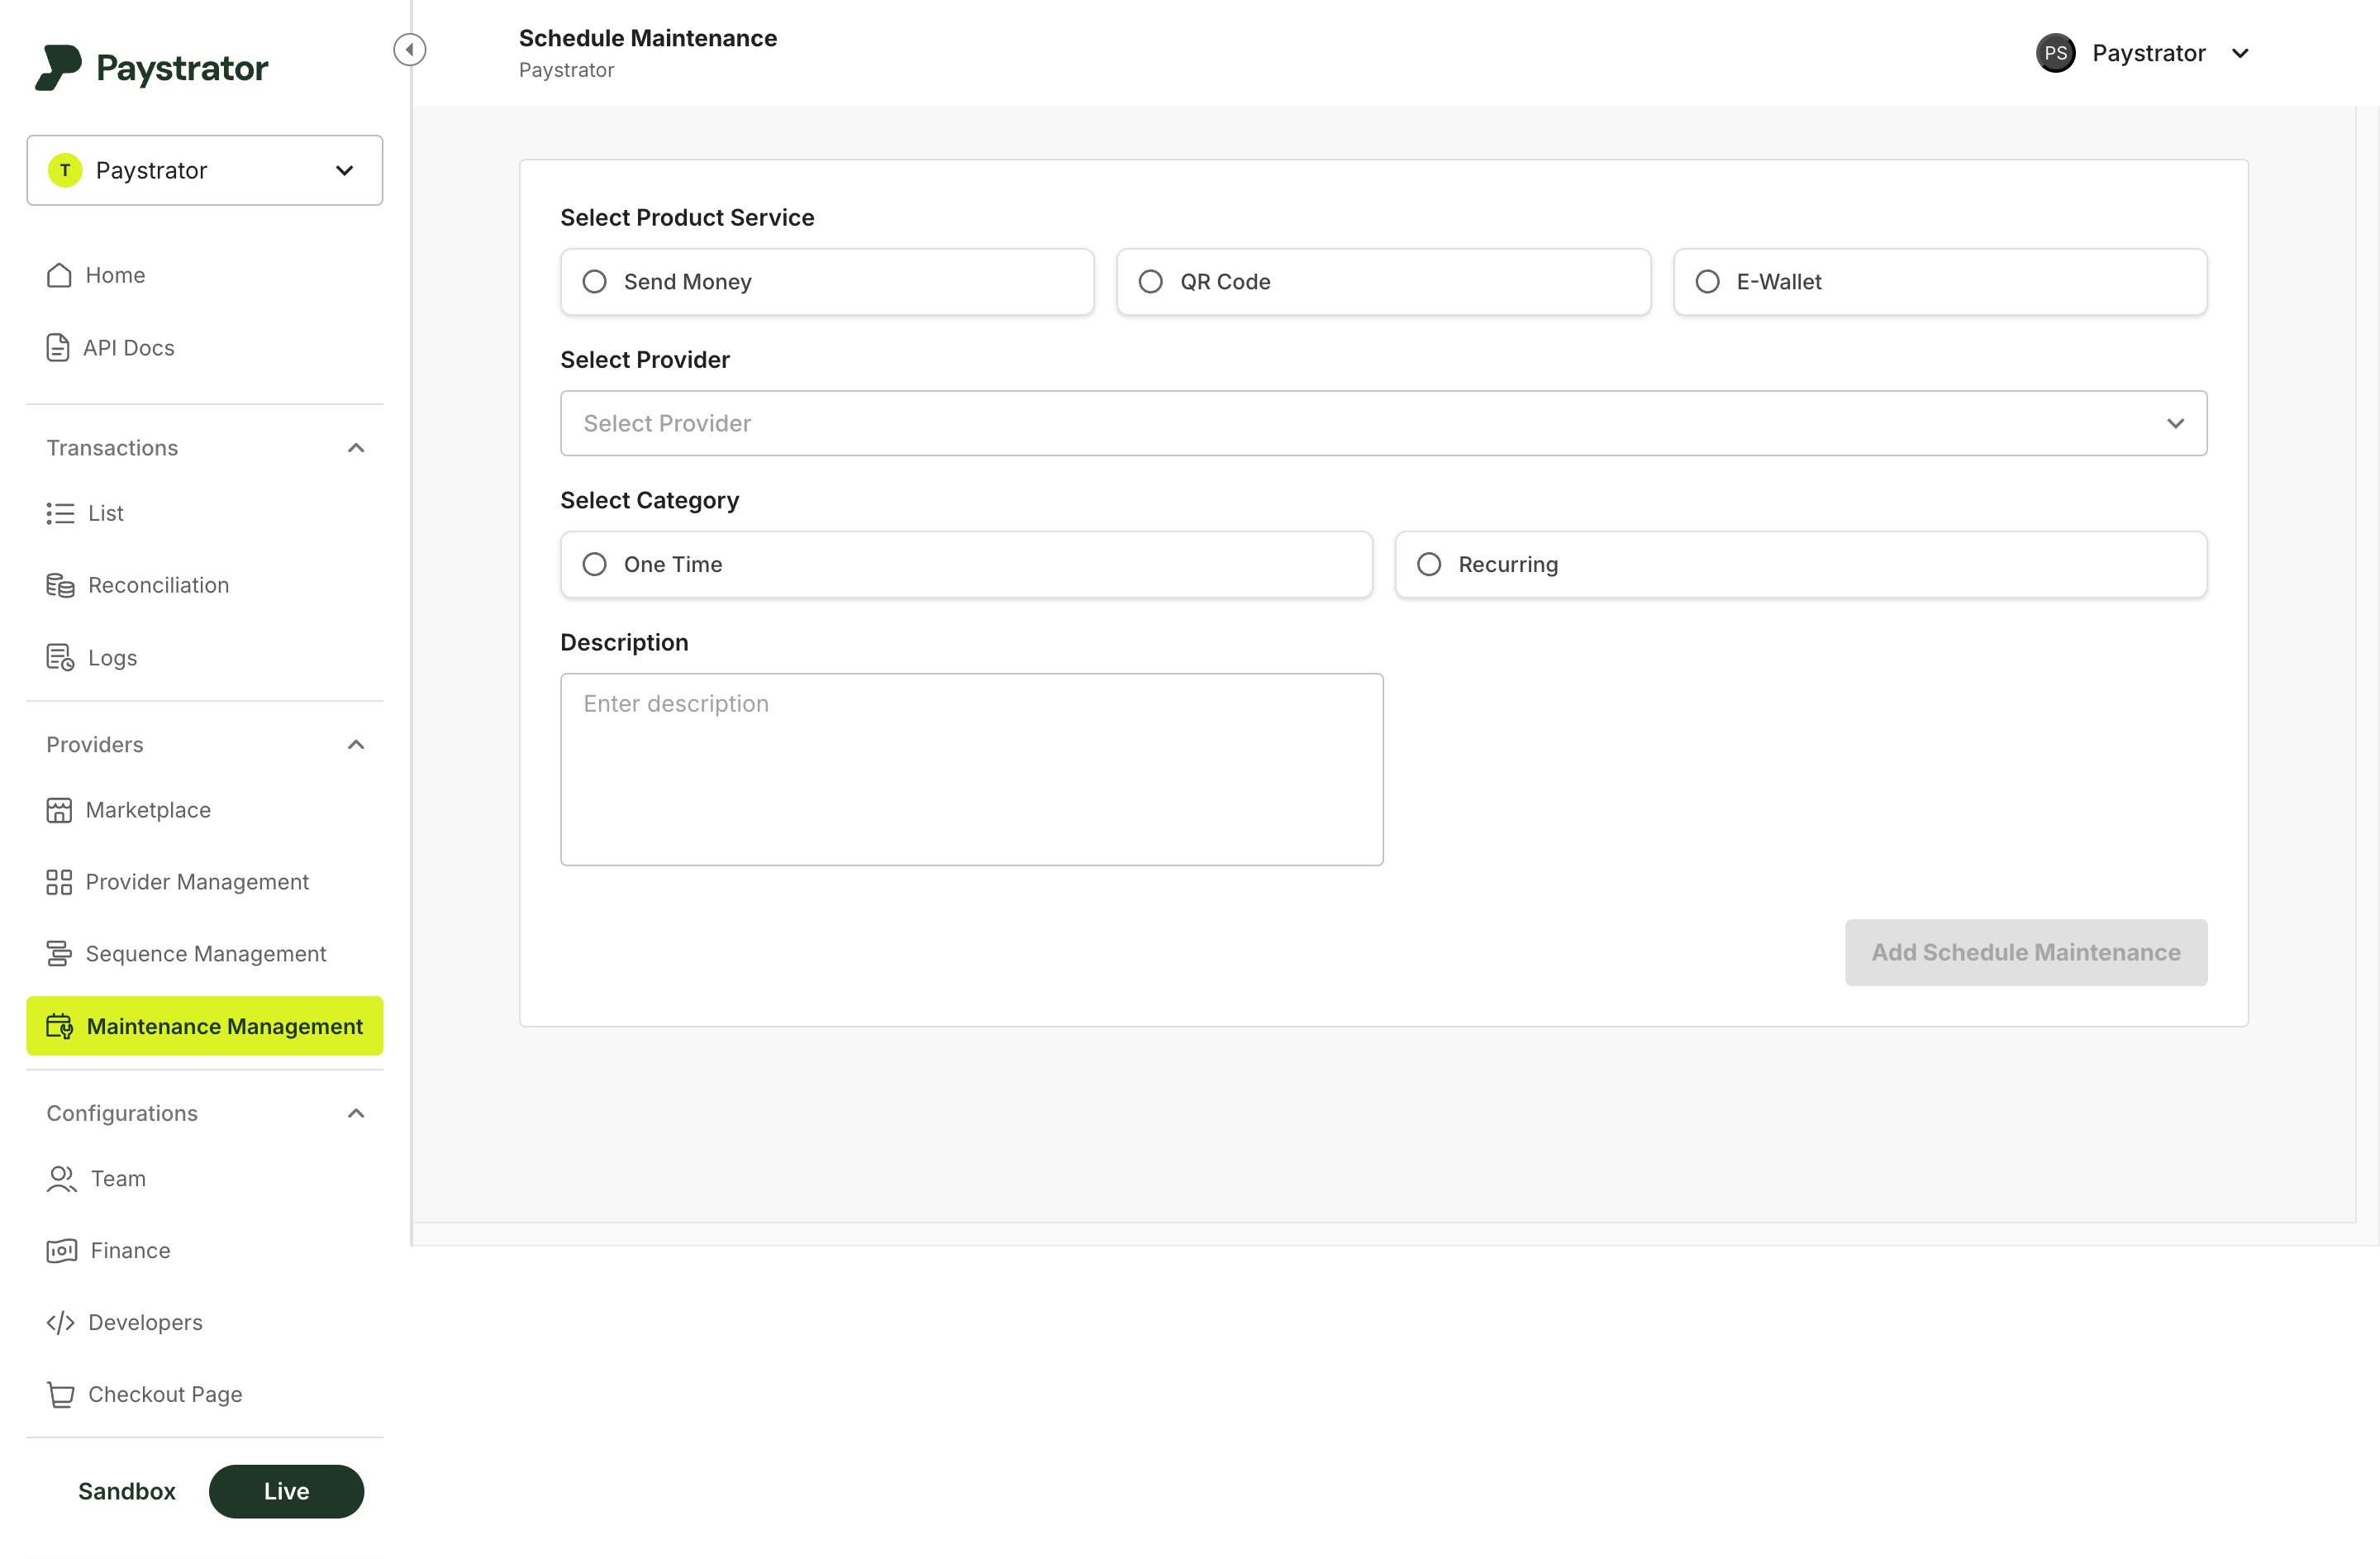
Choose which service the maintenance applies to, for example: Send Money, QR Code, E-Wallet.
Choose one or multiple providers that you want to set on maintenance.
You may only select providers that are already onboarded to your account.
You can select:
One Time
For a single maintenance window.
You may choose between:
- Immediate → Set a duration (e.g., 1 hour). Maintenance starts now.
- Custom Schedule → Select start and end date/time.
Recurring
For repeating schedules.
Choose one of the recurring options:
- Daily
- Weekly
- Monthly
You will then set the recurring dates, days, and time period.
Provide a short explanation of your maintenance (up to 150 characters).
Example: “System upgrade” or “Provider downtime”.
Once the form is complete, click Add Schedule Maintenance.
A confirmation window will appear showing:
- Product Service
- Provider(s)
- Type of schedule
- Start/end time in your local timezone
- Recurring details (if any)
- Description
After reviewing, click Confirm to save the schedule.
🚦Maintenance Status
Statuses update automatically:
| Status | Meaning |
|---|---|
| Upcoming | Maintenance is scheduled for a future time. |
| On-going | Maintenance is active right now. |
| Completed | Maintenance has ended. |
| Cancelled | You manually cancelled the schedule. |
Recurring maintenance will repeat based on your selected schedule.
❌ Cancel a Maintenance
You can cancel any Upcoming or On-Going maintenance.
- Open the Maintenance list
- Click the action menu
- Select Cancel
- Confirm the cancellation
The cancelled schedule remains in your history.
🖥 Status Log
For each maintenance entry, you can open Status Log to view the full history of:
• Status changes
• Time of each update
• Who performed the action
• System updates (e.g., automatic transitions)
This provides clear visibility for auditing and operations.
🕓 Timezone
All schedules are saved in UTC, but displayed in your local timezone on the dashboard for clarity.
Format example:
Monday, 16/06/2025 17:30:35