
Create a Paystrator checkout via a simple HTML form — no backend required. The script initializes a CSRF session, validates inputs, creates a checkout session, and redirects users to The Hosted Checkout Page.
Important NoteThe form relies on these element IDs:
#ps-form,#ps-amount,#ps-description,#ps-type,#ps-button.
Quick Start
This Checkout Form can only be tested on Live Environment. We encourage you to try the Hosted Checkout Page API if you need to try on Sandbox Environment.
Add the widget script to your page and include your Published-Key as a query parameter:
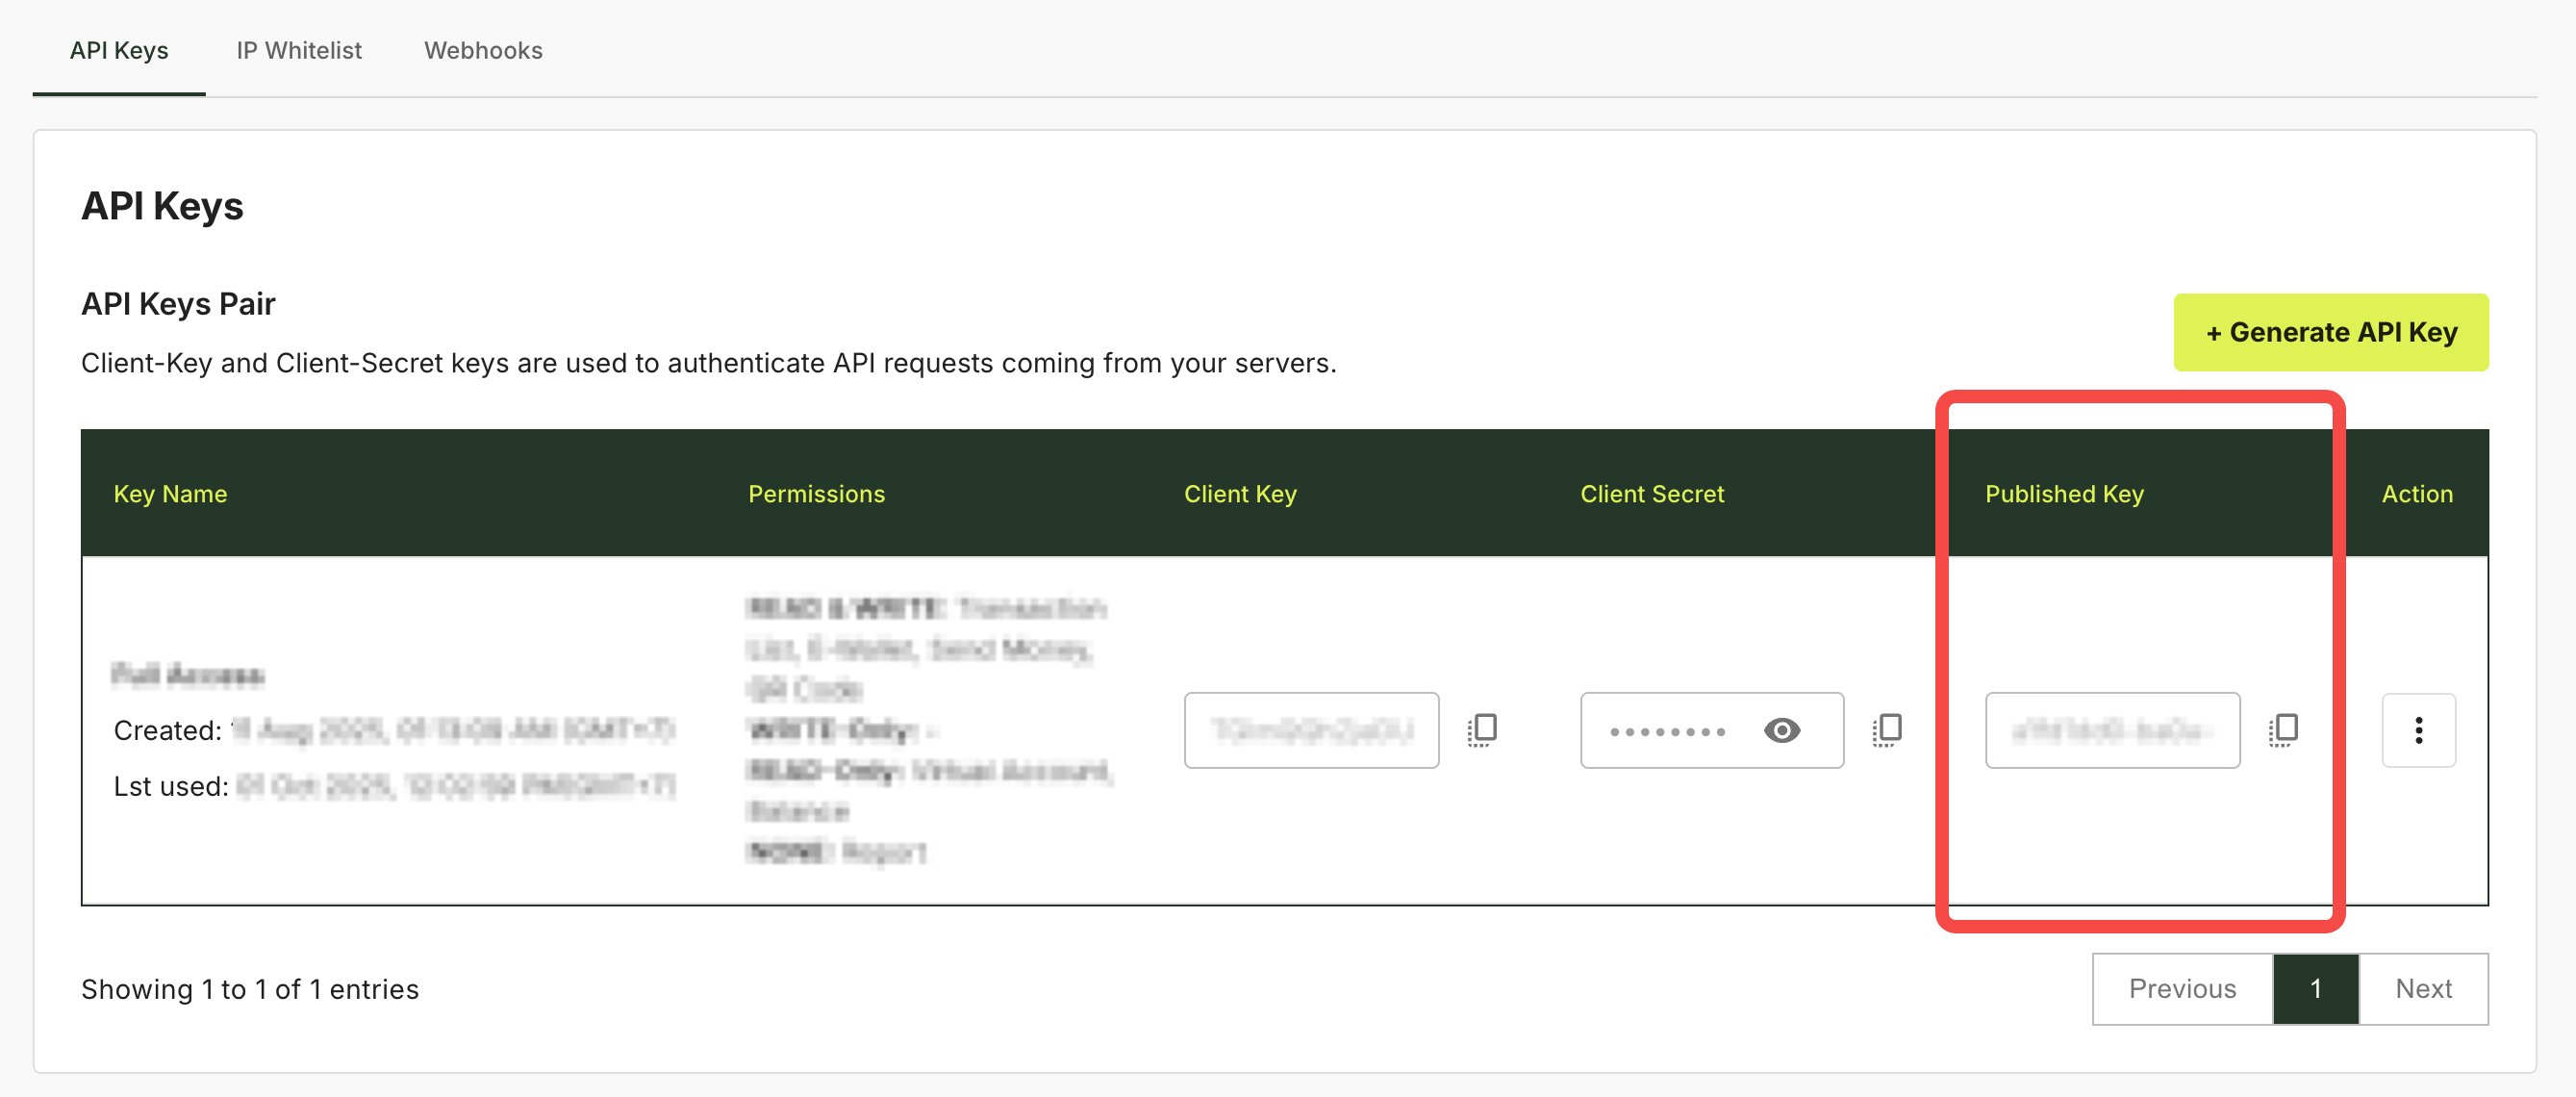
- You can find your Published-Key under Developers Configuration > API Keys in the Paystrator Dashboard.
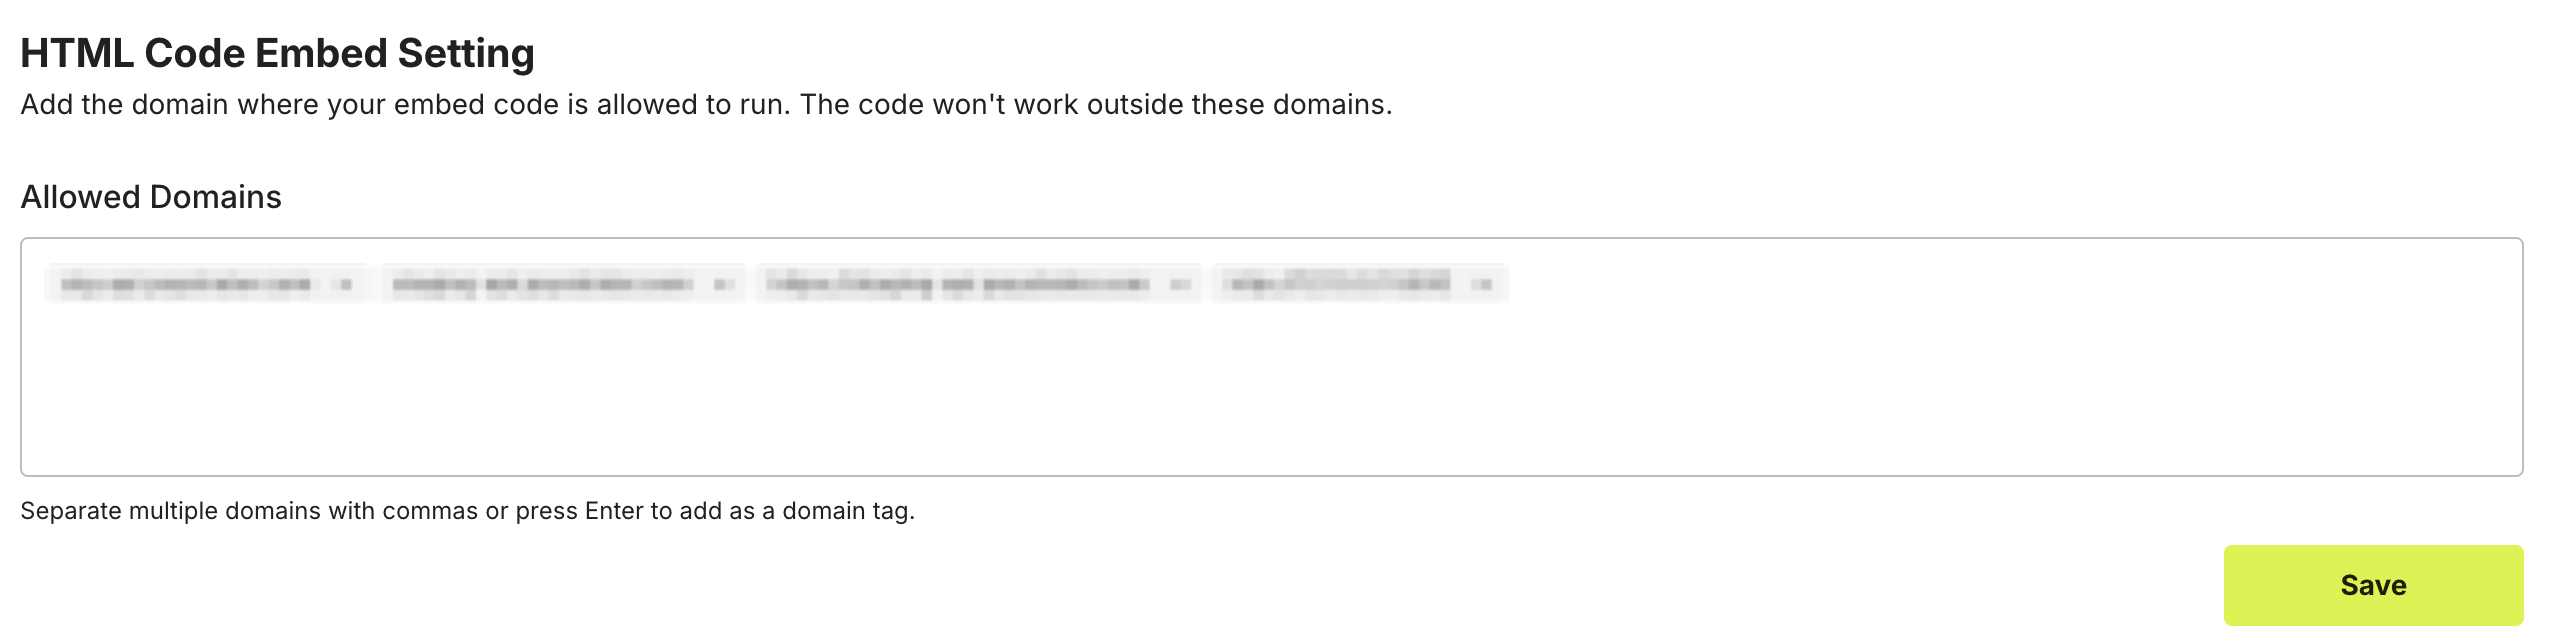
- You can configure your Allowed Domains under Checkout Page Configuration in the Paystrator Dashboard.
Make sure the domain serving your page is listed under Allowed Domains, otherwise requests will fail with
403 ORIGIN_NOT_ALLOWED.
Secure Session Initialization (CSRF) When
form.jsloads, it automatically calls/v1/auth/clients/csrfto initialize a secure browser session. This process issues CSRF cookies that are automatically included in subsequent requests, ensuring that API calls triggered by the Pay button can only originate from a real browser with valid session cookies.
Minimal usage (only pubkey is required):
pubkey is required):<script src="https://paystrator.com/v1/form.js?pubkey={Published-Key}"></script>pubkey is mandatory. All other parameters are optional.
A Pay Now button will automatically appear.
Form Example that use all element:
Simply add the form and load form.js with your Published Key, place the <script> after the form so the script can find the elements.
<form id="ps-form">
  <label>Amount</label>
  <input id="ps-amount" type="text" placeholder="e.g. 150000">

  <label>Description</label>
  <input id="ps-description" type="text" placeholder="e.g. Order #123">

  <label>Payment Type</label>
  <select id="ps-type">
    <option value="">Auto Select</option>
    <option value="virtual_account">Virtual Account</option>
    <option value="ewallet">E-Wallet</option>
    <option value="qrcode">QR Code</option>
    <option value="credit_card">Credit Card</option>
  </select>

  <button id="ps-button" type="button" disabled>Pay</button>
</form>

<!-- Required: Published Key -->
<script src="https://paystrator.com/v1/form.js?pubkey={Published-Key}"></script>
Parameters
| Name | Required | Default | Description |
|---|---|---|---|
pubkey | Yes | — | Your Published Key. Checkout will not run without this. |
ps-amount | No | — | Number (e.g. 150000). If omitted, your end-user can finalize the amount on the checkout page. |
ps-description | No | — | Free text (e.g. Order #123). |
ps-type | No | Auto | One of virtual_account, ewallet, qrcode, credit_card. If empty, the checkout page shows all available methods. If only one is available for the client, it is auto-selected. |
ps-button | No | — | To show Pay CTA to User |
Button Behavior
-
Clicking Pay button will:
- Make the button hidden.
- A “Please wait…” message appears (element
#ps-statusis auto-created if missing).
-
On error:
- The button reappears, “Please wait…” is hidden.
- A warning box appears with error details (style override is supported).
Override Styling Hooks
- Pay button:
#ps-button - Loading text:
#ps-status(auto-created if absent) - Warning box:
.ps-warn(base CSS injected; override as needed)
Example overrides:
<style>
  #ps-button { padding: 10px 16px; border-radius: 6px; }
  #ps-status { font-style: italic; margin-left: 8px; }
  .ps-warn   { max-width: 560px; }
</style>
Examples
A) Standard form, end-user fills everything
In this example, end-user will select the payment type, input the amount, and fill the description.
<form id="ps-form">
  <label>Amount</label>
  <input id="ps-amount" type="text" placeholder="e.g. 150000">

  <label>Description</label>
  <input id="ps-description" type="text" placeholder="e.g. Order #123">

  <!-- Lock to QR Code -->
  <select id="ps-type">
    <option value="">Auto Select</option>
    <option value="virtual_account">Virtual Account</option>
    <option value="ewallet">E-Wallet</option>
    <option value="qrcode">QR Code</option>
    <option value="credit_card">Credit Card</option>
  </select>

  <button id="ps-button" type="button" disabled>Pay</button>
</form>
<script src="https://paystrator.com/v1/form.js?pubkey={Published-Key}"></script>
B) Hidden fields for static data, end-user only see the final price and method
Use hidden inputs for values that never change (price, product code, method). This reduces user error and keeps the UI minimal.
<!-- Visual-only summary -->
<h3>Premium Plan</h3>
<p>One-time payment to activate Premium features.</p>
<p><strong>Total:</strong> IDR 150,000</p>

<form id="ps-form">
  <!-- Static values via hidden inputs -->
  <input id="ps-amount" type="hidden" value="150000">
  <input id="ps-description" type="hidden" value="Premium Plan #PRM-001">
  <input id="ps-type" type="hidden" value="qrcode"><!-- lock to QR Code -->

  <!-- Only the Pay button is visible -->
  <button id="ps-button" type="button" disabled>Pay</button>
</form>
<script src="https://paystrator.com/v1/form.js?pubkey={Published-Key}"></script>
Why choose this scenario?
- Prevent accidental edits of fixed information.
- Cleaner UI (only a button).
- Still easy to change later by editing the HTML values.
C) Donation style (editable amount, optional note)
<form id="ps-form">
  <label>Donation Amount</label>
  <input id="ps-amount" type="text" placeholder="e.g. 50000">

  <input id="ps-description" type="text" placeholder="(optional) Your note">

  <!-- Hidden: force QR Code -->
  <input id="ps-type" type="hidden" value="qrcode">

  <button id="ps-button" type="button" disabled>Pay</button>
</form>
<script src="https://paystrator.com/v1/form.js?pubkey={Published-Key}"></script>
D) Preset values but visible (so users can tweak)
<form id="ps-form">
  <label>Amount</label>
  <input id="ps-amount" type="text" value="120000">

  <label>Description</label>
  <input id="ps-description" type="text" value="Invoice #9981">

  <select id="ps-type">
    <option value="">Auto Select</option>
    <option value="virtual_account">Virtual Account</option>
    <option value="ewallet">E-Wallet</option>
    <option value="qrcode">QR Code</option>
    <option value="credit_card">Credit Card</option>
  </select>

  <button id="ps-button" type="button" disabled>Pay</button>
</form>
<script src="https://paystrator.com/v1/form.js?pubkey={Published-Key}"></script>
E) Read-only amount (hard locked price in UI)
<form id="ps-form">
  <label>Amount</label>
  <input id="ps-amount" type="text" value="275000" readonly>

  <label>Description</label>
  <input id="ps-description" type="text" value="Subscription Pro">

  <input id="ps-type" type="hidden" value="qrcode">

  <button id="ps-button" type="button" disabled>Pay</button>
</form>
<script src="https://paystrator.com/v1/form.js?pubkey={Published-Key}"></script>
F) Provide your own status element (full style control)
The script auto-creates
#ps-statusif missing. You can add it yourself to style it exactly.
<form id="ps-form">
  <input id="ps-amount" type="text" placeholder="e.g. 150000">
  <input id="ps-description" type="text" placeholder="e.g. Order #123">
  <input id="ps-type" type="hidden" value="qrcode">

  <button id="ps-button" type="button" disabled>Pay</button>
  <span id="ps-status" style="display:none;margin-left:8px">Please wait...</span>
</form>
<script src="https://paystrator.com/v1/form.js?pubkey={Published-Key}"></script>
Troubleshooting
“Invalid Published Key”
- Cause:
pubkeymissing, still{Published-Key}, ornull/undefined. - Fix: Use the real Published Key from your dashboard.
“Unable to initialize security session (CSRF)”
- Cause: CSRF init failed (CORS/credentials/cookies).
- Fix: Allow your domain, ensure cookies are enabled, and the browser sends credentials.
“Amount must be a number”
- Cause: Non-numeric value in
#ps-amount. - Fix: Digits only (no thousand separators or currency symbols).
Button stays disabled
- Cause: Validation issues (pubkey/amount/type) or CSRF not ready.
- Fix: Correct inputs, wait for CSRF initialization, or set a supported
type(or leave empty for auto).
Notes
- The script will enable the Pay button when valid.
- If
typeis empty, the hosted checkout shows all available payment methods; if only one method is available for the client, it will be auto-selected. - Keep
<script src=".../form.js?pubkey=...">after the form markup so elements are found reliably.