
Before running your first test, let’s understand how Paystrator works and what you need to configure.
How Paystrator Works
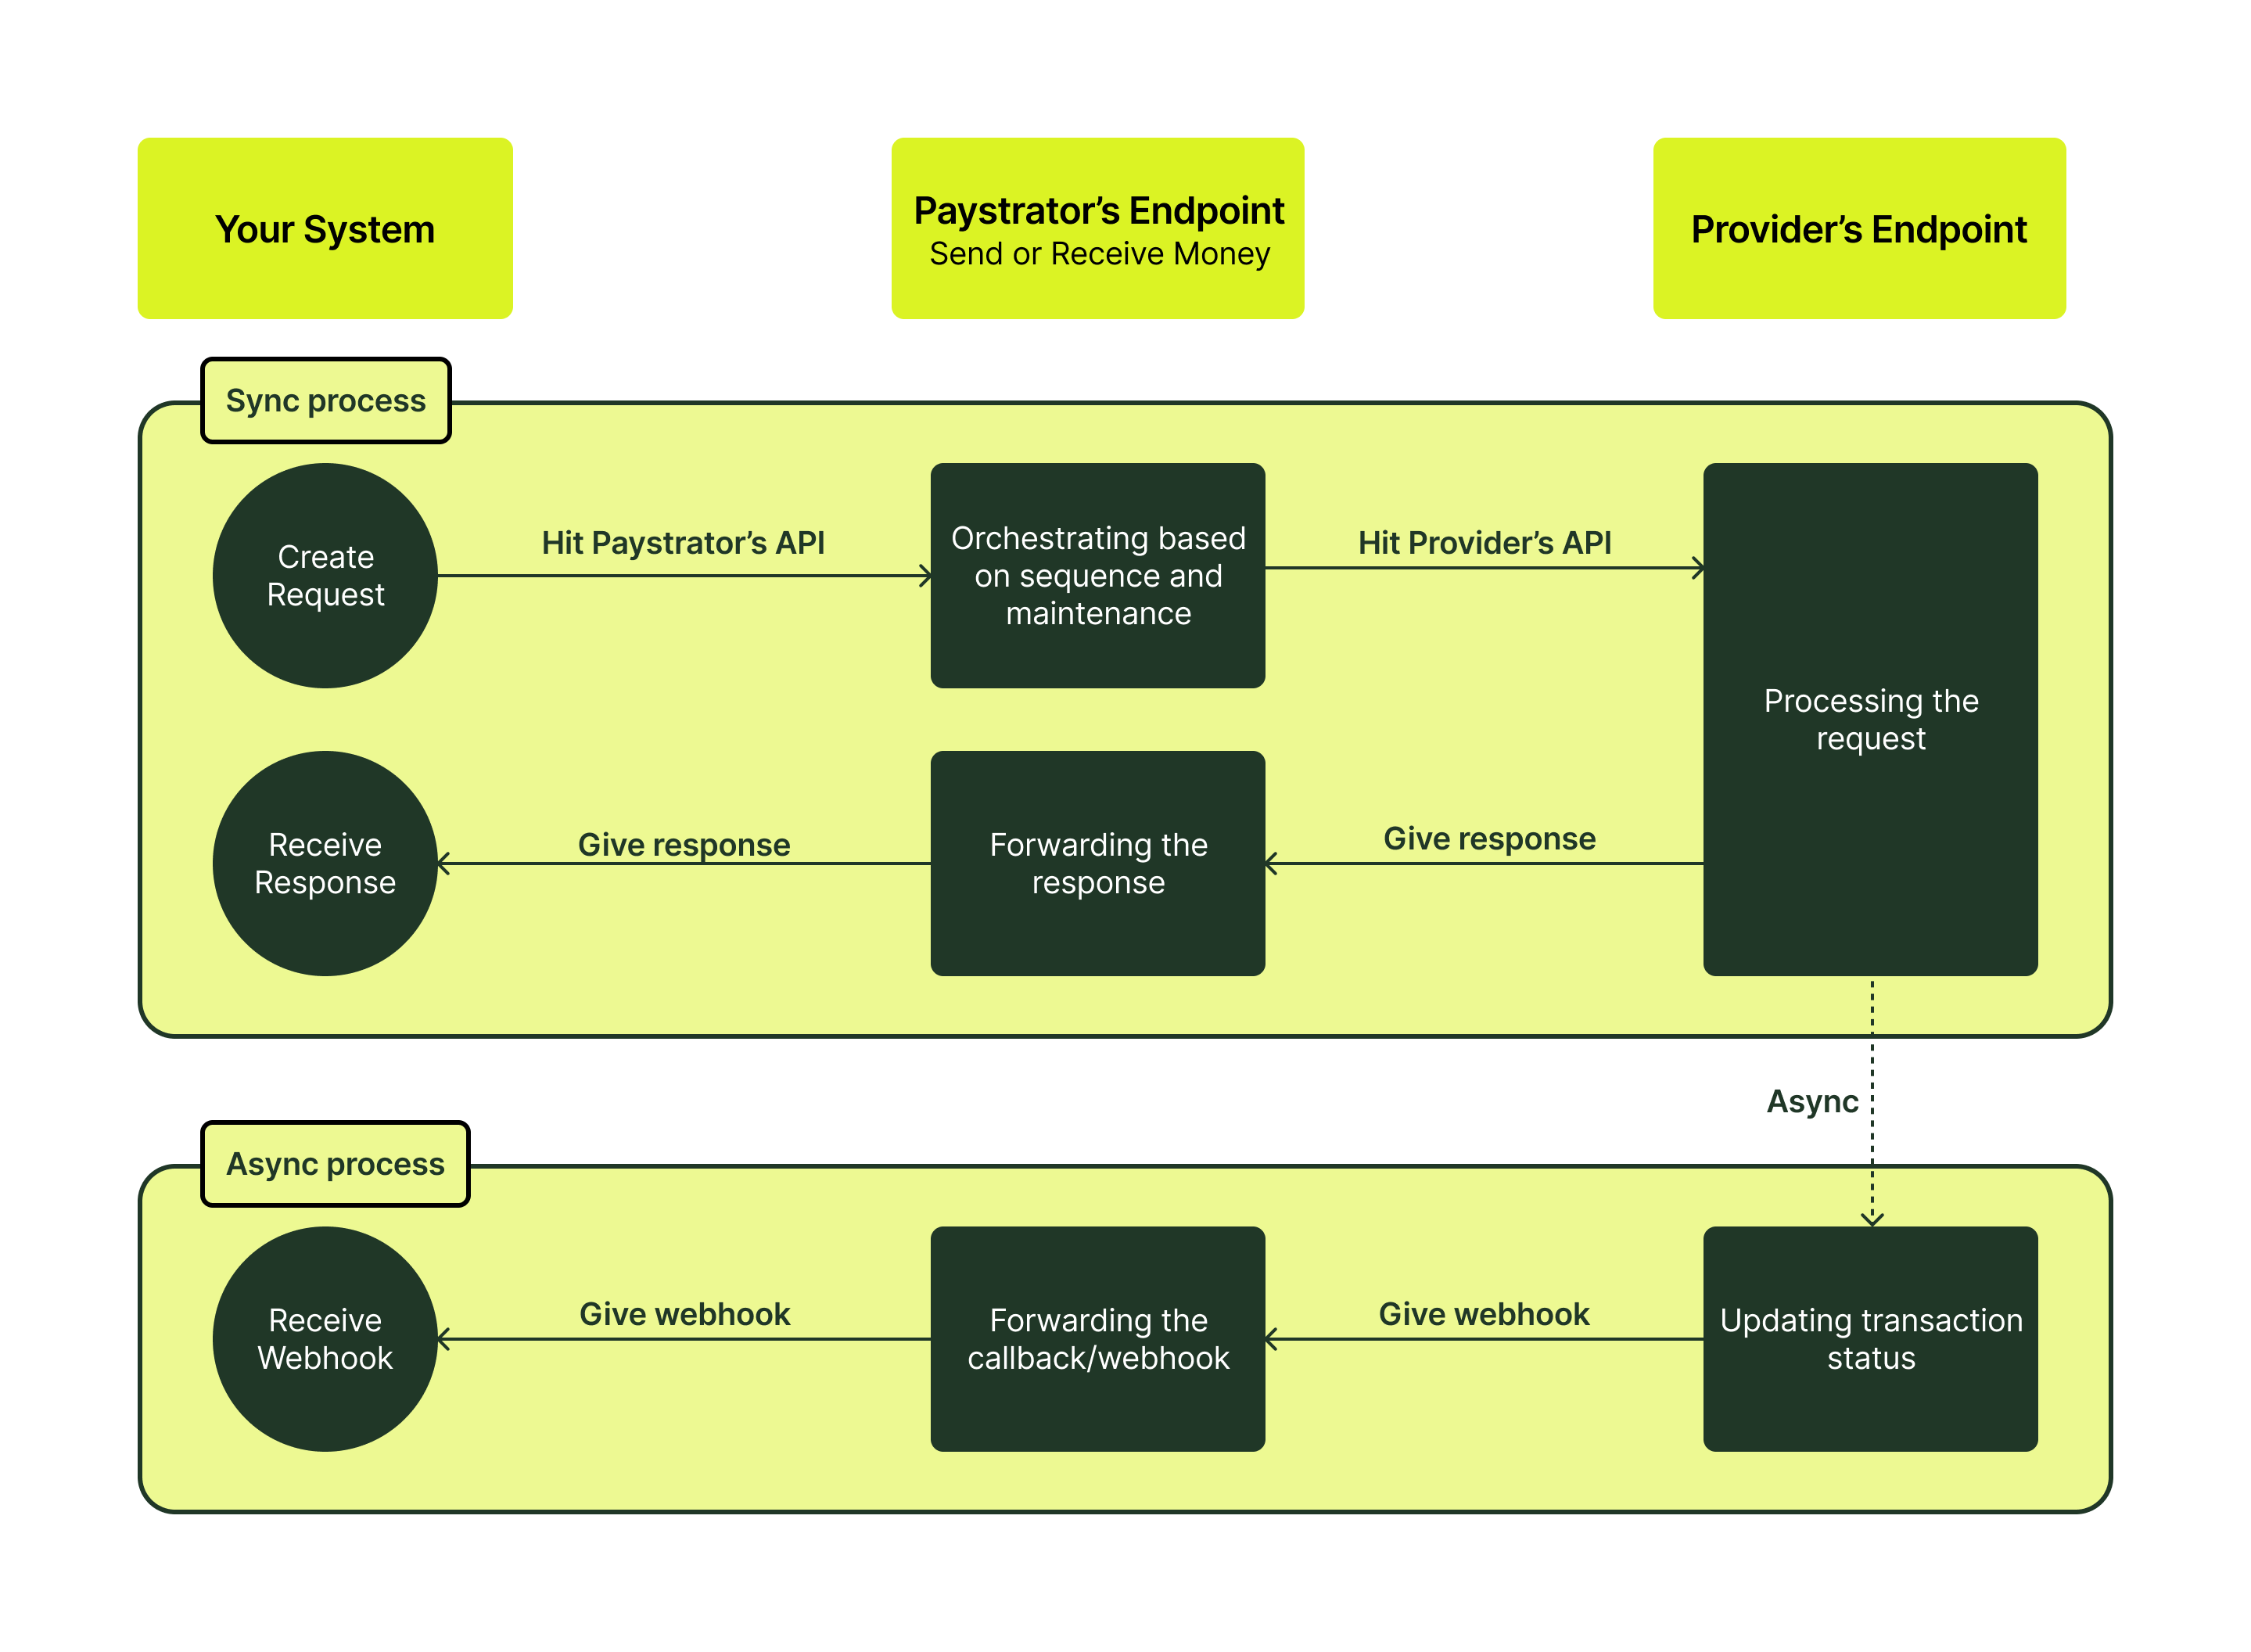
Paystrator acts as an intelligent intermediary between your system and your payment providers. It helps you:
- Manage traffic distribution
- Orchestrate provider fallback and routing
- Monitor transactions and provider reliability
What Paystrator Does:
- Routes your API requests to the appropriate provider
- Forwards provider responses and callbacks back to your system
- Surfaces performance metrics for each provider via logs and insights
Paystrator is API-based — transactions must be created via API requests. The dashboard is for configuration and monitoring only.
What You Need to Set Up:
Before you can test or go live, you’ll need to configure these:
- Whitelist Paystrator’s IP in your provider’s dashboard
So your provider accepts requests from Paystrator on your behalf - Whitelist your server’s IP in Paystrator
So we can authenticate that requests are truly coming from your backend - Set Paystrator’s webhook URL in your provider’s configuration
So provider callbacks (e.g., status updates) are routed to us - Set your own webhook URL in Paystrator’s dashboard
So we can pass those callbacks to your system
Please continue reading to set these settings!
Configuring Your Testing Environment
Your testing environment includes a preloaded test company: Dummy Company.
Before sending transactions, ensure you have:
✅ API Key – Already generated for your testing account, ready to use in API requests.
✅ IP Whitelist – Add your server’s IP so Paystrator can accept your API calls.
✅ Webhook Endpoint – Add your callback URL to receive transaction updates.
Once your webhook and IP are set, you can start testing!
▶️ Next Step
Continue to: API Keys Configuration Guide